 en
en 中文简体
中文简体 русский
 Español
 Deutsch
 Polskie
 REQUEST A QUOTE

 Home / News / Industry News / What Rotational Molding Advantages Mean for Wall Thickness, Tooling Cost, and Design Freedom
 What Rotational Molding Advantages Mean for Wall Thickness, Tooling Cost, and Design Freedom
Content
- 1 What Is Rotational Molding and How Does the Process Actually Work
- 2 The Rotational Molding Cycle Step by Step
- 3 Quality Control: Spotting and Preventing Common Defects
- 4 Environmental and Lifecycle Considerations
- 5 Why Manufacturers Choose Rotational Molding: Core Advantages
- 6 Rotational Molding vs Blow Molding: A Practical Comparison
- 7 Material Versatility Across Resin Families
- 8 Design Considerations: Wall Thickness, Corners, and Tooling Costs
- 9 Where Rotational Molding Is Used in Practice
- 10 Frequently Asked Questions
- 10.0.1 Q1: What is rotational moulding used for most often?
- 10.0.2 Q2: How thick can a rotationally molded wall be made?
- 10.0.3 Q3: Is rotational molding cheaper than blow molding for small production runs?
- 10.0.4 Q4: Can rotationally molded parts include metal inserts or fittings?
- 10.0.5 Q5: What causes uneven wall thickness in a finished part?
What Is Rotational Molding and How Does the Process Actually Work
Rotational molding, sometimes written as rotomolding, is a manufacturing process used to produce hollow plastic parts with a single continuous wall and no seams. A measured charge of powdered or liquid resin is loaded into a hollow metal mold, the mold is closed and mounted on an arm that rotates on two perpendicular axes at the same time, and the entire assembly is moved into an oven. As the mold turns, gravity and heat work together to spread the softened resin evenly across the interior surface. Once the resin has fully fused, the mold moves into a cooling station while it continues to rotate, and the finished part is removed once it has solidified enough to hold its shape.
Anyone asking what is rotational moulding at a technical level should understand that the process depends on time, heat, and rotation rather than injection pressure. There is no high pressure clamping force and no injection point, which is why rotationally molded parts do not show weld lines, sink marks, or parting line flash in the way that injection molded parts often do. The absence of internal pressure also means the mold itself can be built from thinner, lighter materials than the steel tooling required for injection or blow molding, which has a direct effect on tooling budgets for new part programs.
The rotation speed ratio between the two axes, generally described as a major to minor axis ratio, is selected based on the shape of the part. Long narrow shapes use a different ratio than round or square containers, since the goal is to keep every internal surface in continuous contact with the melting resin. Getting this ratio wrong is one of the most common causes of thin spots or heavy buildup in corners, so mold designers spend considerable time modeling rotation patterns before a new tool is cut.
It is also worth noting how this process differs from casting, which some people confuse it with. Casting typically pours liquid material into a stationary open mold and relies on the material setting under ambient conditions, while rotational molding keeps the mold sealed and constantly turning through a controlled heat cycle. That continuous motion is what produces the even wall thickness and hollow, seamless shape that makes this process useful for tanks, housings, and other large containers that need to hold liquids or resist repeated impact over a long service life.
The Rotational Molding Cycle Step by Step
A full production cycle can be broken into four distinct stages, and each stage has its own temperature and timing requirements that must be tuned to the wall thickness and material being used.
| Stage | What Happens | Typical Focus Point |
|---|---|---|
| Loading | Resin charge measured by weight and poured into an open mold half | Charge accuracy for wall thickness |
| Heating | Mold rotates on two axes inside an oven while resin melts and coats the wall | Oven temperature curve and rotation ratio |
| Cooling | Mold continues rotating outside the oven under forced air or water mist | Cooling rate to limit warpage |
| Demolding | Mold opens once the part is dimensionally stable | Cycle time and part release |
Quality Control: Spotting and Preventing Common Defects
Even with a well designed mold, rotational molding depends heavily on process discipline. Oven temperature, rotation ratio, and cooling rate all interact, and a small shift in any one of them can show up as a visible defect on the finished part. Understanding what these defects look like, and what usually causes them, saves considerable rework time on a new tool.
| Defect | Typical Appearance | Common Cause |
|---|---|---|
| Warpage | Flat panels bow or twist after demolding | Uneven cooling rate across the part surface |
| Bridging | Resin fails to reach sharp internal corners | Rotation ratio mismatched to part geometry |
| Pinholes | Small surface voids, mostly near corners | Trapped air or moisture in the resin charge |
| Blistering | Raised bubbles on the outer wall | Oven temperature held too high for too long |
| Thin Walls | Localized thinning on flat or vertical faces | Insufficient resin charge or incorrect cycle time |
Most production facilities catch these issues through a combination of visual inspection, wall thickness measurement at several points on the part, and periodic drop testing to confirm impact resistance meets the target specification. Because the mold itself is relatively inexpensive to adjust compared with injection tooling, correcting a bridging or thin wall issue often only requires a change to the rotation program or resin charge rather than a rebuild of the tool.
Environmental and Lifecycle Considerations
Sustainability has become a larger part of tooling decisions across most manufacturing sectors, and rotational molding has a few characteristics worth noting on this front. Because the process uses powdered or liquid resin rather than pellets fed through a screw under pressure, scrap material from trimming can often be reground and reused in future charges without the same degradation risk seen in some high shear processes.
The long service life typical of rotationally molded tanks and containers, often ten years or more in outdoor conditions, also reduces the frequency of replacement compared with thinner walled alternatives that crack or fatigue sooner. At end of life, single material polyethylene parts are comparatively straightforward to recycle since there are no bonded layers or mixed materials to separate, provided that any metal inserts were mechanically fastened rather than fully encapsulated.
None of this means rotational molding is automatically the lower impact choice for every project. Cycle times are longer than blow molding or injection molding, which means more energy is spent per part on oven heating, so the environmental comparison ultimately depends on part size, expected service life, and how the finished product will be handled once it reaches the end of its use.
Why Manufacturers Choose Rotational Molding: Core Advantages
The rotational molding advantages that matter most to product teams generally fall into five categories: geometry freedom, wall consistency, part strength, tooling economics, and material choice. Each of these advantages of rotational molding stems directly from the low pressure, slow rotation nature of the process.
Design Freedom
Because there is no injection point or clamping pressure, molds can include deep undercuts, double walls, and intricate ribbing that would be difficult or impossible to release from a two piece injection tool. Multiple components can also be molded as one continuous shell, cutting down on assembly steps later.
Uniform Wall Thickness
Slow, continuous rotation distributes resin evenly across every interior surface, producing a uniform wall thickness even on parts with sharp transitions between flat and curved sections. This consistency reduces the risk of localized weak points that show up under repeated flexing or impact.
Stress-Free Parts
Without injection pressure pushing molten resin through narrow gates, the finished part carries almost no internal molded-in stress. Stress-free parts resist cracking around corners and mounting points far better than parts molded under high pressure, especially in outdoor or temperature swinging environments.
Cost-Effective Tooling
Molds for this process are typically cast or fabricated from aluminum or sheet metal rather than machined from hardened tool steel, since they never experience clamping force. This makes cost-effective tooling realistic for mid volume production runs and for parts that would otherwise need multiple tool revisions during development.
Material Versatility
While polyethylene remains the most common resin family, the same basic equipment can process a range of powders and liquid resins, giving product teams material versatility when a project calls for added stiffness, chemical resistance, or ultraviolet stability.
Rotational Molding vs Blow Molding: A Practical Comparison
Product teams evaluating rotational molding vs blow molding usually care about four practical factors: part size range, wall thickness control, tooling investment, and production volume. Both processes create hollow parts, but the mechanics behind each one lead to very different trade offs.
| Factor | Rotational Molding | Blow Molding |
|---|---|---|
| Part Size Range | Small containers up to very large tanks in one piece | Best suited to small and mid size bottles or tanks |
| Wall Thickness Control | Highly consistent across the whole surface | Can vary, thinner at corners and stretched zones |
| Tooling Cost | Lower, since molds do not resist clamping pressure | Higher, tooling must withstand blow pressure |
| Production Volume Fit | Low to mid volume, longer cycle time per part | Mid to high volume, faster cycle time |
| Design Complexity | Handles double walls, inserts, and undercuts well | Limited by parison stretch and pinch lines |
| Internal Stress | Minimal, no injection pressure involved | Present at pinch points and stretched areas |
Neither process is universally better. Blow molding tends to win on high volume bottle style production where cycle speed drives cost per unit down, while rotational molding tends to win whenever a project needs large one piece parts, thick durable walls, or frequent design changes during early production runs.
Material Versatility Across Resin Families
Polyethylene dominates rotational molding because of its wide processing window and impact resistance, but it is available in several grades that behave differently once melted and cooled.
- Linear polyethylene, valued for impact strength and outdoor durability
- Cross linked polyethylene, used where chemical resistance and rigidity matter more than repairability
- Polypropylene, chosen for parts that must tolerate higher continuous temperatures
- Nylon based powders, used in specialty parts requiring higher stiffness and lower moisture pickup
- Polycarbonate, reserved for clear or highly impact resistant components
Additives play just as large a role as the base resin. Ultraviolet stabilizers extend outdoor service life, pigments are blended directly into the powder rather than applied as a surface coating so color runs through the full wall thickness, and foam cores can be introduced between two layers to add insulation or floatation without a large weight increase.
Grinding resin into a consistent powder particle size is a separate step that has a real effect on the finished part. Particles that are too coarse take longer to melt fully and can leave small unmelted specks embedded in the wall, while particles ground too fine can create dust handling issues and uneven bulk density inside the mold. Most processors work with resin suppliers to match particle size distribution to the specific wall thickness and cycle time targets of a given part family, rather than relying on a single generic grind for every project.
Design Considerations: Wall Thickness, Corners, and Tooling Costs
Because the process relies on gravity and heat transfer rather than pressure, a few design habits consistently produce better parts and lower scrap rates.
Wall Thickness Targets
Most functional parts fall between three and twelve millimeters of wall thickness, with thicker sections reserved for structural load points such as mounting bosses or lifting points. Pushing wall thickness far beyond what a part needs mainly adds cycle time and material cost without a proportional gain in strength.
Corner Radii and Draft
Sharp internal corners tend to build up excess material because resin pools there during rotation, while overly generous draft angles can leave outside corners thinner than the rest of the wall. A moderate, consistent radius throughout the tool keeps buildup predictable.
Tooling Cost Planning
Since cost-effective tooling is one of the main reasons teams choose this process, it helps to plan mold changes early. Cast aluminum tooling can be modified with weld repairs and re-machining far more easily than hardened injection steel, so design revisions during a product's first year are considerably cheaper to implement.
Venting and Kiss Off Points
Every mold needs a vent tube so that internal pressure can equalize as hot air expands and later contracts during cooling. Without adequate venting, a part can collapse inward as it cools or resist release from the mold cavity. Where a design calls for a double wall section, kiss off points, small areas where the inner and outer wall touch, are used to create ribs or mounting bosses without adding a separate insert, and these points need careful placement so they do not restrict resin flow during the heating stage.
Where Rotational Molding Is Used in Practice
Large hollow parts that need to survive outdoor exposure, chemical contact, or repeated impact are the clearest fit for this process. Two categories illustrate the range well.
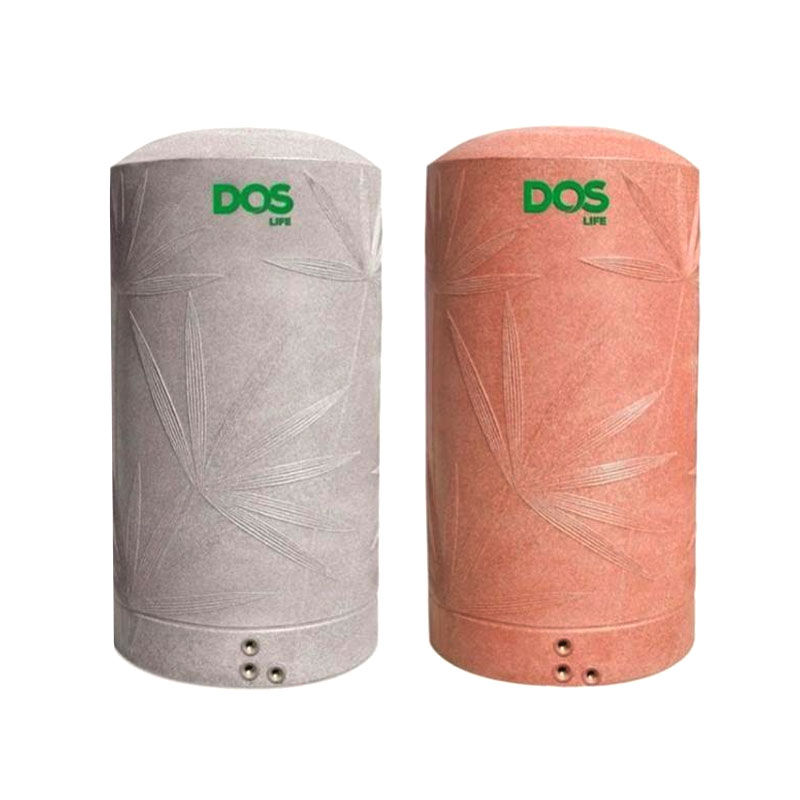
Large capacity storage vessels are one of the most common applications, since a single piece water tank storage container mold can produce a seamless tank with no weld joints for water or chemical storage to leak through. The same one piece construction is why many municipal and agricultural water tanks are produced this way rather than welded from sheet material.
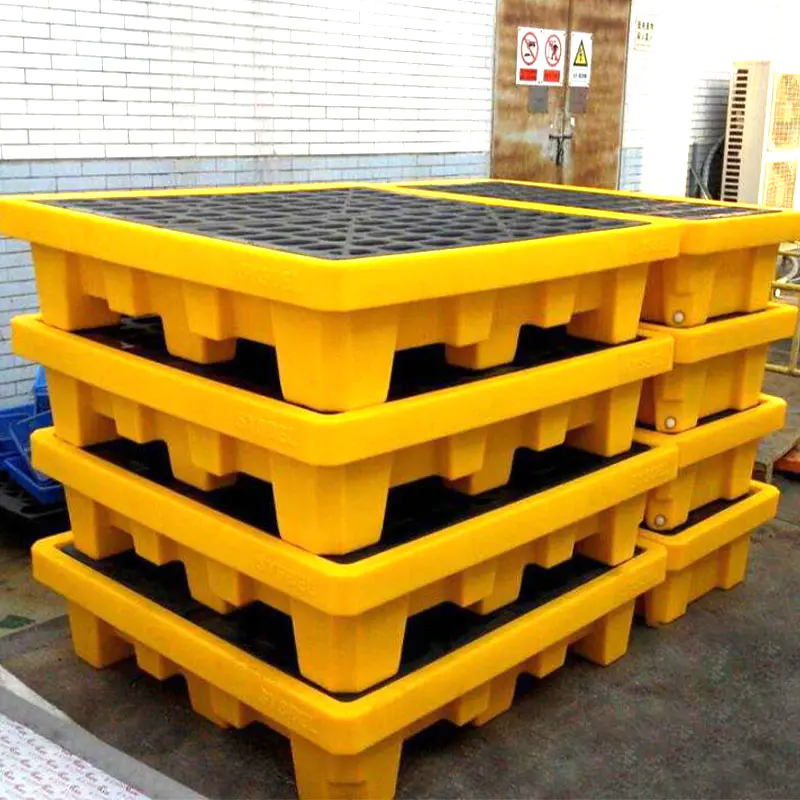
Equipment housings for pressure washers, portable wash stations, and chemical dispensing carts are another strong fit, since an industrial cleaning rotational mold allows a manufacturer to combine a tank, mounting brackets, and cable channels into a single molded shell. Reducing the part count in this way lowers assembly labor and removes potential leak points at joints.
Beyond these two categories, the process regularly shows up in playground equipment, kayaks and small boats, road safety barriers, agricultural feed bins, and material handling containers, all of which benefit from the same combination of impact resistance and one piece construction. Facilities exploring custom rotational molding programs for a new part typically start with a review of expected load points and chemical exposure before finalizing wall thickness targets.
Automotive and marine accessories make up another growing segment, including fuel tanks, air ducting, and floatation components where a seamless wall and resistance to fuel or salt water exposure matter more than raw production speed. In agricultural settings, chemical tanks used for spraying equipment benefit from the same seamless construction, since a welded seam on a tank carrying concentrated fertilizer or pesticide represents a long term failure risk that a one piece rotationally molded tank avoids entirely.
Selecting the right application ultimately comes down to matching part requirements against what the process does well. Parts that need to be produced in very high volumes with tight dimensional tolerances on thin walls are usually better served by injection or blow molding, while parts that need large size, thick durable walls, or complex one piece geometry consistently favor rotational molding.
Frequently Asked Questions
Q1: What is rotational moulding used for most often?
It is most often used for hollow parts that need to be produced as a single seamless piece, such as storage tanks, equipment housings, and outdoor containers that must resist impact and weather exposure over many years.
Q2: How thick can a rotationally molded wall be made?
Wall thickness generally ranges from about three to twelve millimeters for functional parts, though thicker sections are possible at specific load bearing points by adjusting the resin charge and cycle timing.
Q3: Is rotational molding cheaper than blow molding for small production runs?
For low to mid volume runs it is often more economical because tooling does not need to withstand internal pressure, which keeps mold fabrication and modification costs lower than the tooling required for blow molding.
Q4: Can rotationally molded parts include metal inserts or fittings?
Yes, metal inserts, fittings, and mounting hardware can be placed into the mold before the cycle begins so that the resin fuses directly around them, creating a secure fitting without a separate assembly step.
Q5: What causes uneven wall thickness in a finished part?
Uneven wall thickness usually traces back to an incorrect rotation speed ratio, an oven temperature curve that is not matched to the part geometry, or a resin charge that was not measured accurately before loading.

We provide customers with one-stop services ranging from product design, mold manufacturing to finished product production.
-
 +86-18006248936
 -
 ricky.t@zhroto.com
 -
 No.9 Jiangyuan Road, Luotang Street, Jiangyan District, Taizhou City,Jiangsu Province, China
Copyright © Jiangsu Zhroto Mould Co., Ltd. Rights Reserved.Custom Rotational Plastic Molding Factory
